
Auto-Transcribing Zoom Interviews into a CSV with Speaker, Punctuation and Timestamps
This post will show you a step-by-step process for recording Zoom sessions (such as interviews) and automatically generating a transcript. It involves several steps: Configure Zoom to Record Audio in Separate Files, Use ffmpeg to Convert Separate Audio Files into One Right-left Split MP3, Upload the File to Google’s Cloud Transcription and Configure, and Generating a CSV from JSON.
Interviews are an important part of UX and HCI research. More recently,I have been using Zoom to interview folks as part of my research. Typically, I draw my questions to participants from a combination of glancing at a semi-structured interview script and whatever seems interesting from conversation..Creating transcripts helps me remember what we talked about and prepares material for the qualitative coding (e.g. Grounded Theory and Thematic Analysis) I often use for research projects
Transcription takes a long time. Manual transcription, where you listen to an audio clip and pause as you type what you hear, takes a very long time. Even experienced transcribers need at least twice the amount of time to type out the same amount of audio. It takes me around four hours to transcribe each hour of audio, but it feels even longer.
One unexpected benefit of using Zoom for interviews is that it can separate the audio channels per user. This means that using automatic transcripts, which is becoming very accurate, can transcribe both the spoken word and the speaker. Google’s speech-to-text pricing is .006 per minute, which works out to less than fifty cents per hour. At less than 50 cents per interview, the cost is well worth it. Let’s get started!
Configure Zoom to Record Audio in Separate Files
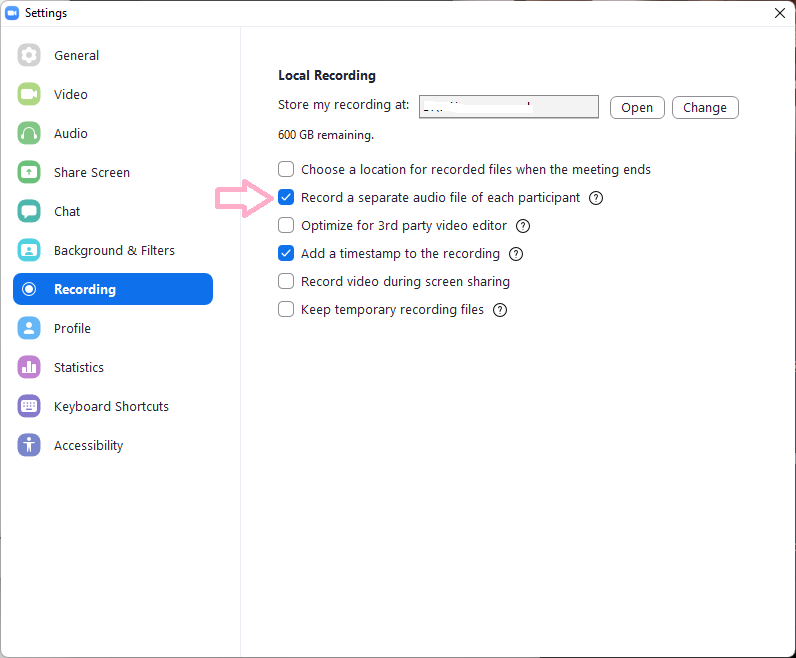
In your client application of Zoom, click on your profile in the top right and then “Settings”. Next, select the “Recording” tab and enable the option to “Record a separate audio file of each participant. Normally, recording on Zoom creates a config, video (mp4) and audio file (.m4a). With this new setting, Zoom will generate an audio file for each participant in an Audio Record folder.
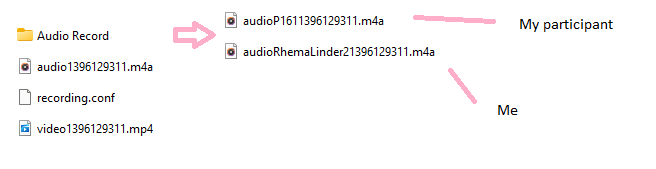
We will use the files audioP1611396129311.m4a and audioRhemaLinder21396129311.m4a in the next step to create one stereo audio file with me in the left channel and P16 on the right. Notice that the first file has P16 in the name and the second shows Rhema Linder because Zoom uses the identifiers you see during the chat in the name. For interviews, it is nice to use a pseudonym (e.g. P16). If you are the host, you can rename the Zoom names of your participants by right clicking on their name or thumbnail. This defaults to a real name or whatever they recently used in Zoom.
Use ffmpeg to Convert Separate Audio Files into One Right-left Split MP3
You could do this part manually in a tool like Audacity, but I prefer console-based tools like ffmpeg. Ffmpeg is a swiss army knife for audio and video editing that I am most familiar with controlling with terminal. I have tried to understand ffmpeg deeply, but usually end up googling around for solutions to random problems. I use a Windows machine with Ubuntu WSL. If you have a similar setup, you should be able to run:
sudo apt-get install ffmpeg
With ffmpeg installed, you can go to the directory with the separated audio files and use this command to join them:
ffmpeg -i audioRhemaLinder21396129311.m4a -i audioP1611396129311.m4a -filter_complex "[0:a][1:a]amerge=inputs=2[a]" -map "[a]" p16-combined.mp3
Success! The file called p16-combined.mp3 now looks like this in Audacity:
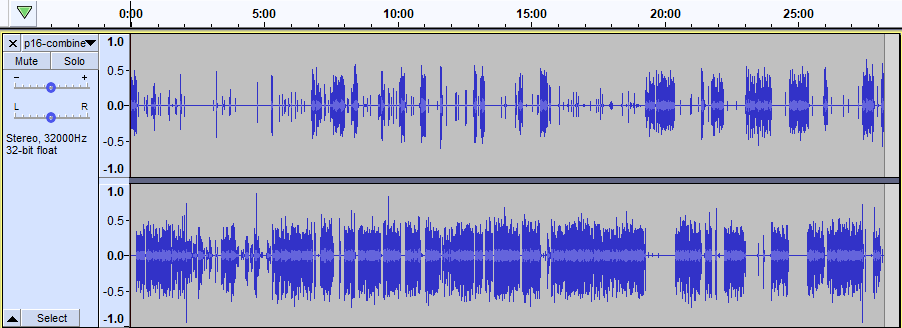
You may notice that there is more activity in the bottom channel (interviewee) than the top (interviewer/me). Probably the tiny ticks are me saying things like “interesting”, “hmm”, and “mkay”.
Upload the File to Google’s Cloud Transcription and Configure
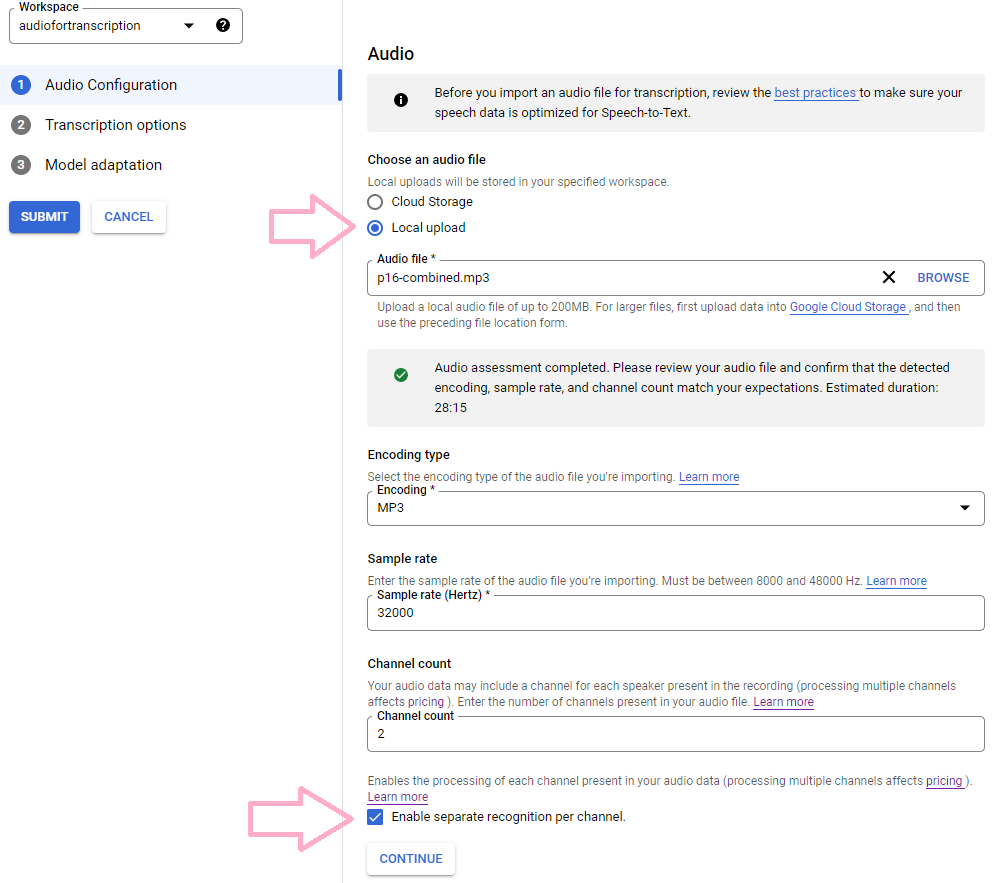
Google’s cloud services are similar to AWS in that there are multitudes of services. You may need to create an account to log into the speech-to-text portal. To configure it for transcription, first upload the mp3 file you made. This will pre-populate different settings automatically such as the encoding, sample rate, and channel count. You will want to ensure that the “Enable separate recognition per channel” so that the right (me/you) and left (my/your participant) are evaluated on their own.
Hitting the continue button then shows more options in “Transcription options”. You must select a language. I selected en-“US”. Next, be sure to expand the “advanced settings” to select “Automatic punctuation”. This will add the periods, commas, and capitalization that I find to work well.
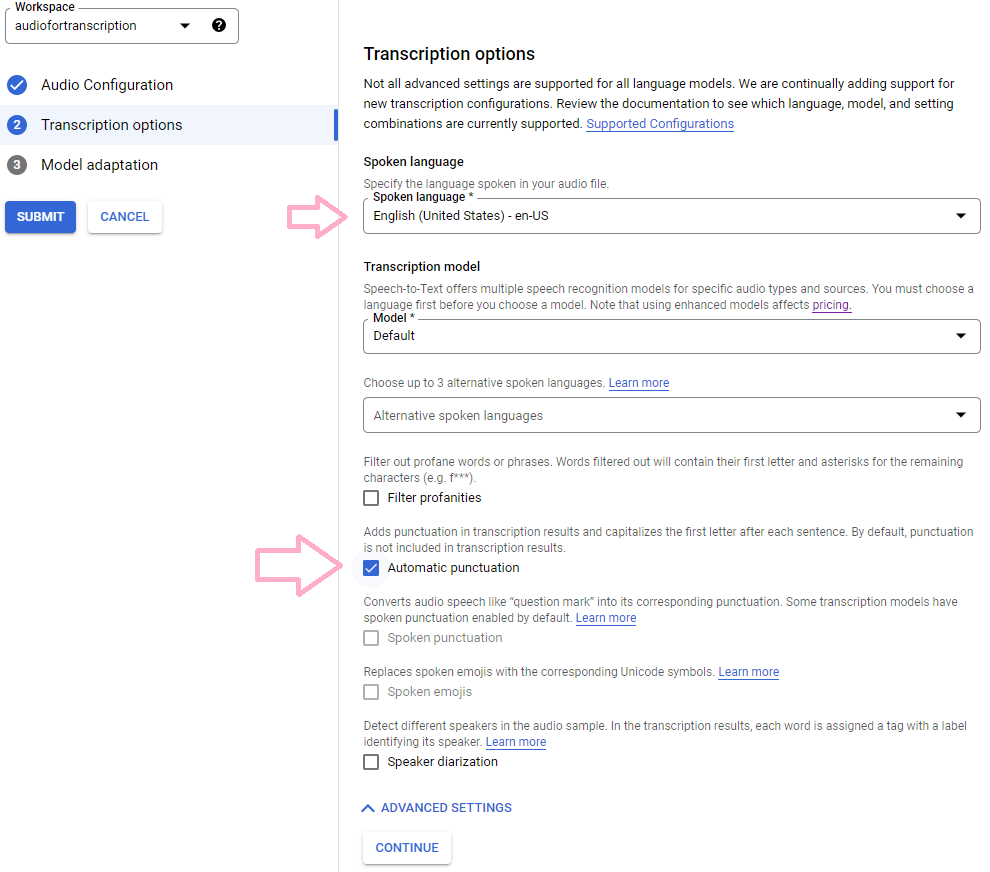
Clicking “continue” and then “submit” will start the transcription process. There is an option to use “model adaptation”, which seems to allow for targeting specific keywords, but we are not interested in that for interviews.
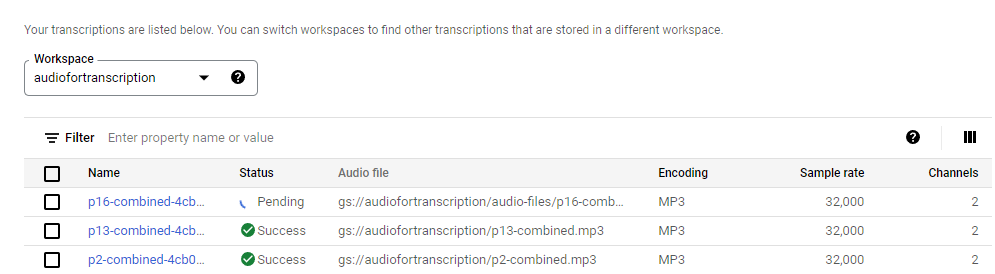
Processing around 60 minutes of interview data took me 4 minutes, but these processes are likely batched so your mileage may vary. When it was done, it shows I have nearly 60 minutes (not thirty) of “billed audio minutes”. This doubling is due to essentially doing the transcription twice, one for each channel.

The preview of results shows a transcription and the columns for Time, Channel, Language, and Confidence. Time shows the clock time of the discussion. We can read the Channel column as “speaker”, with a “1” for me and a “2” for the participant. The Transcript column contains punctuation and the best guess of what was said. The JSON file that you see when clicking the link to “Transcript” shows far more detail than we need, such as when each word was said. Unfortunately, I have not found a way to copy and paste this preview, so wrote a Python script to generate a CSV.
Generating a CSV from JSON
CSV files can be opened in spreadsheet programs like Google Sheets and Microsoft Excel. To generate the CSV, you can use or adapt this script I posted on Github.
python3 join-transcripts.py p16-transcript.json
Running the above with one or more files as arguments generates a CSV file called “all-transcripts.csv” that has the same headers as the preview of the transcript, with the additional “participant” column. This helps when you want to have a single CSV file for all of your transcripts (one per participant). Another difference is separate columns for the start and end times.
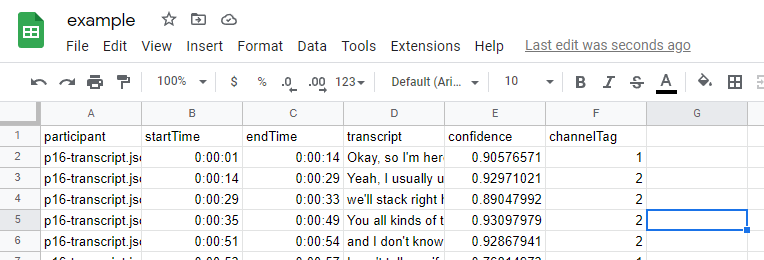
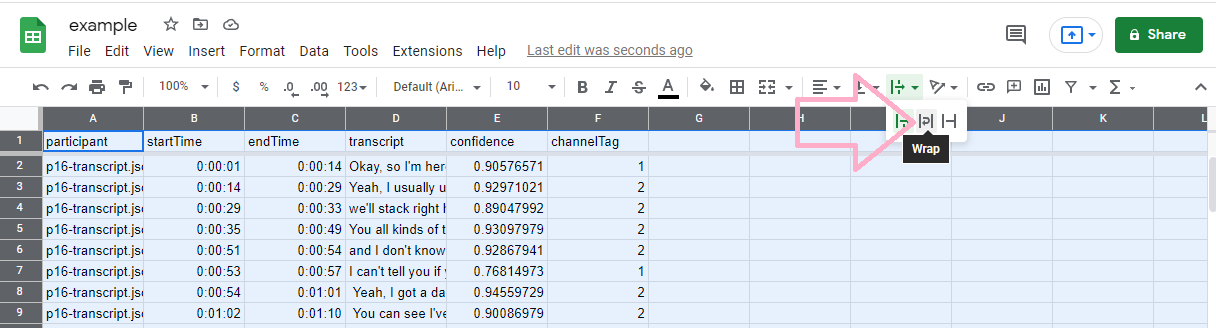
Here above, we see the original file as imported in Google Sheets. We are going to change some of the formatting to make it look nicer and to emphasize the current speaker. Now, I move the top bar down, to display the first rows as headers. Next, I select all the text by clicking to top left cell. This turns everything in the sheet to blue, so I can apply the word wrap option.
Next up, we are going to select the entire column of D for conditional formatting.
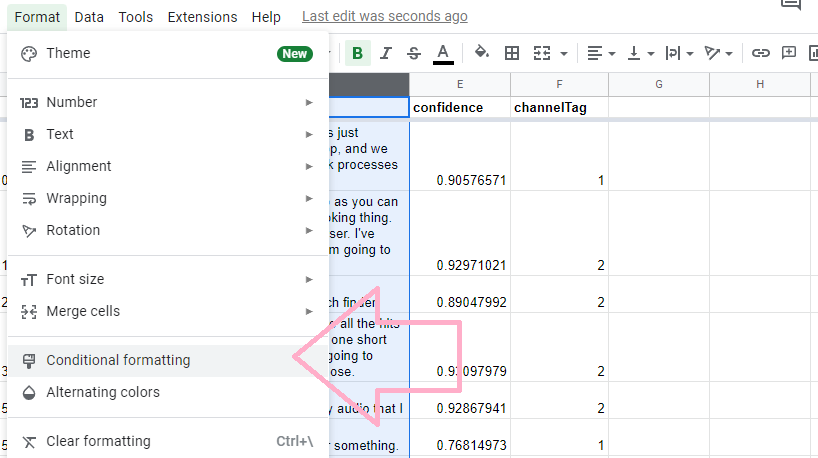
Conditional formatting will help us pick the text style for the transcript, depending on which speaker is speaking.
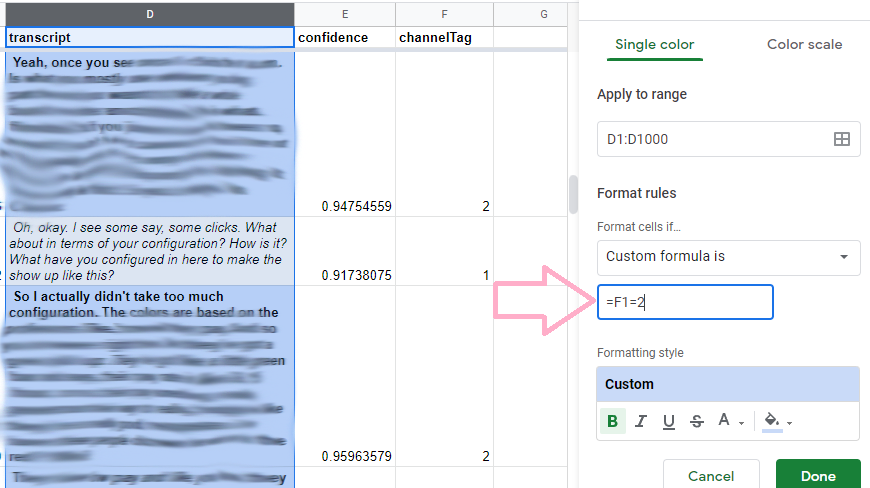
Here, the important part is that we are using a custom formula with “=F1=2.” In the formula, this triggers one of the formats to apply when the F column (speaker) evaluates as “2”. My styling shows italicization for when I am speaking and bolds the text of the participant’s responses.
Final Thoughts
This post shows how you can record Zoom interviews and transcribe them into spreadsheets.This process for generating transcripts is involved, but really very useful and time-saving when compared to doing all of these steps by hand. I tend to talk about a mindset of programming as being “aggressively lazy”. I try to predict where I can save time. Hopefully, the saved time means more time on the good stuff and less time doing arduous audio transcription.
However, I do recommend that you do transcribe some interviews for your own benefit. It is difficult to really capture all nuance when you convert audio conversations to text, even when performed by hand. Conversations over audio channels are fundamentally different from those over text. People often talk over each other, emit meaningful sighs, and gesture in ways that are difficult to put to paper. While this nuance is not always needed to answer research questions, you should be aware that it exists and refer back to the audio or video as needed.